Our last post on rooflights looked at three key questions which always come up when we talk to architects about rooflights in metal roofing.
That article focused on
- Getting water off the roof as quickly as possible
- The impact of rooflight width on this challenge, and
- Preventing water running over the face of the rooflight.
This article looks at two standard rooflight details provided by our partner manufacturer VMZINC and explains how these details enable you to meet these requirements for standing seam zinc roofs pitched at greater than 14º and those between 3 and 14º.
NB This article describes VMZINC rooflight details. Always use the details approved for use by the manufacturer whose product you are using – talk to us if you have any concerns.
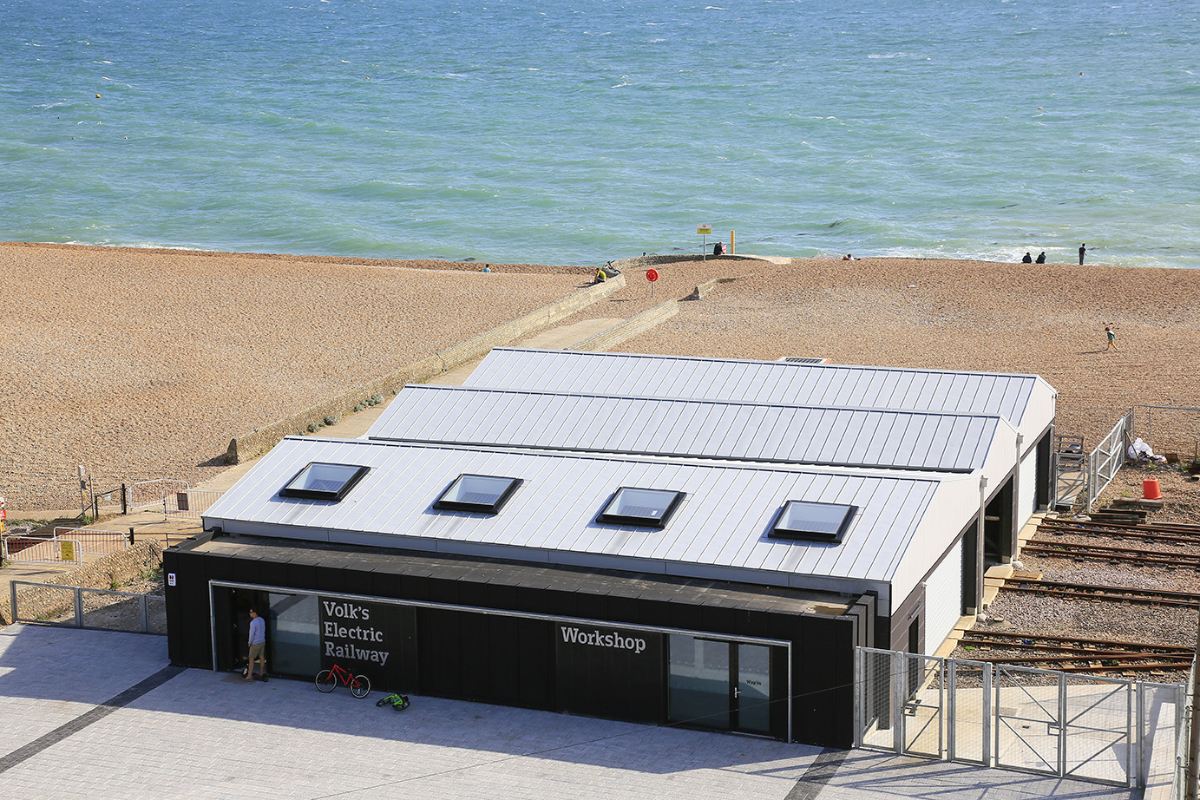
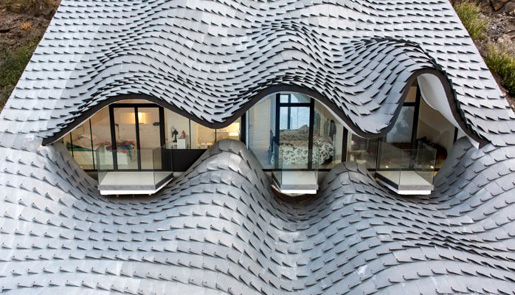
Welted detail rooflights at Volk’s Electric Railway in Brighton
Zinc Rooflights, Movement and Capillary Action
Standing seam roofs are generally put together with mechanical joints. These joints are designed to allow movement across the roof area, because metal needs to expand and contract under different environmental conditions.
However, as the pitch of the roof decreases, there comes a point when the mechanical approach to weathertightness will no longer be sufficient, and joints need to be soldered to keep out the weather.
Lower pitched roofs expose the mechanical joints to capillary action – the process by which closely adjacent flat surfaces draw up water into the gap between them. At lower pitches and when water cannot drain off the roof quickly, capillary action means that mechanical fixings are not sufficient.
Lower pitched roofs (14º and below) require more soldered joints. This explains why a different detail is required for rooflights installed in lower pitched roofs.
VMZINC produces two different standard details for these differences in pitch,
- Welted Detail VMZ-SN-MA-RA-b4 for rooflights installed at above 14º pitch
- Soldered Detail VMZ-SN-MA-RA-b1 for rooflights installed between 3º and 14º
They also produce variations of these for different roof buildups.
You can download the details in dwg format in the Technical Drawings section on their website, and there is further illustration of the installation and details in the VMZINC Installation Guide here.
Want a zinc roof pitched below 3º? We explained why it is not recommended that zinc standing seam roofs are installed below an absolute minimum 3º pitch here.
Let’s look at the welted detail first.
Zinc Standing Seam Rooflight Welted Detail – Above 14º pitch
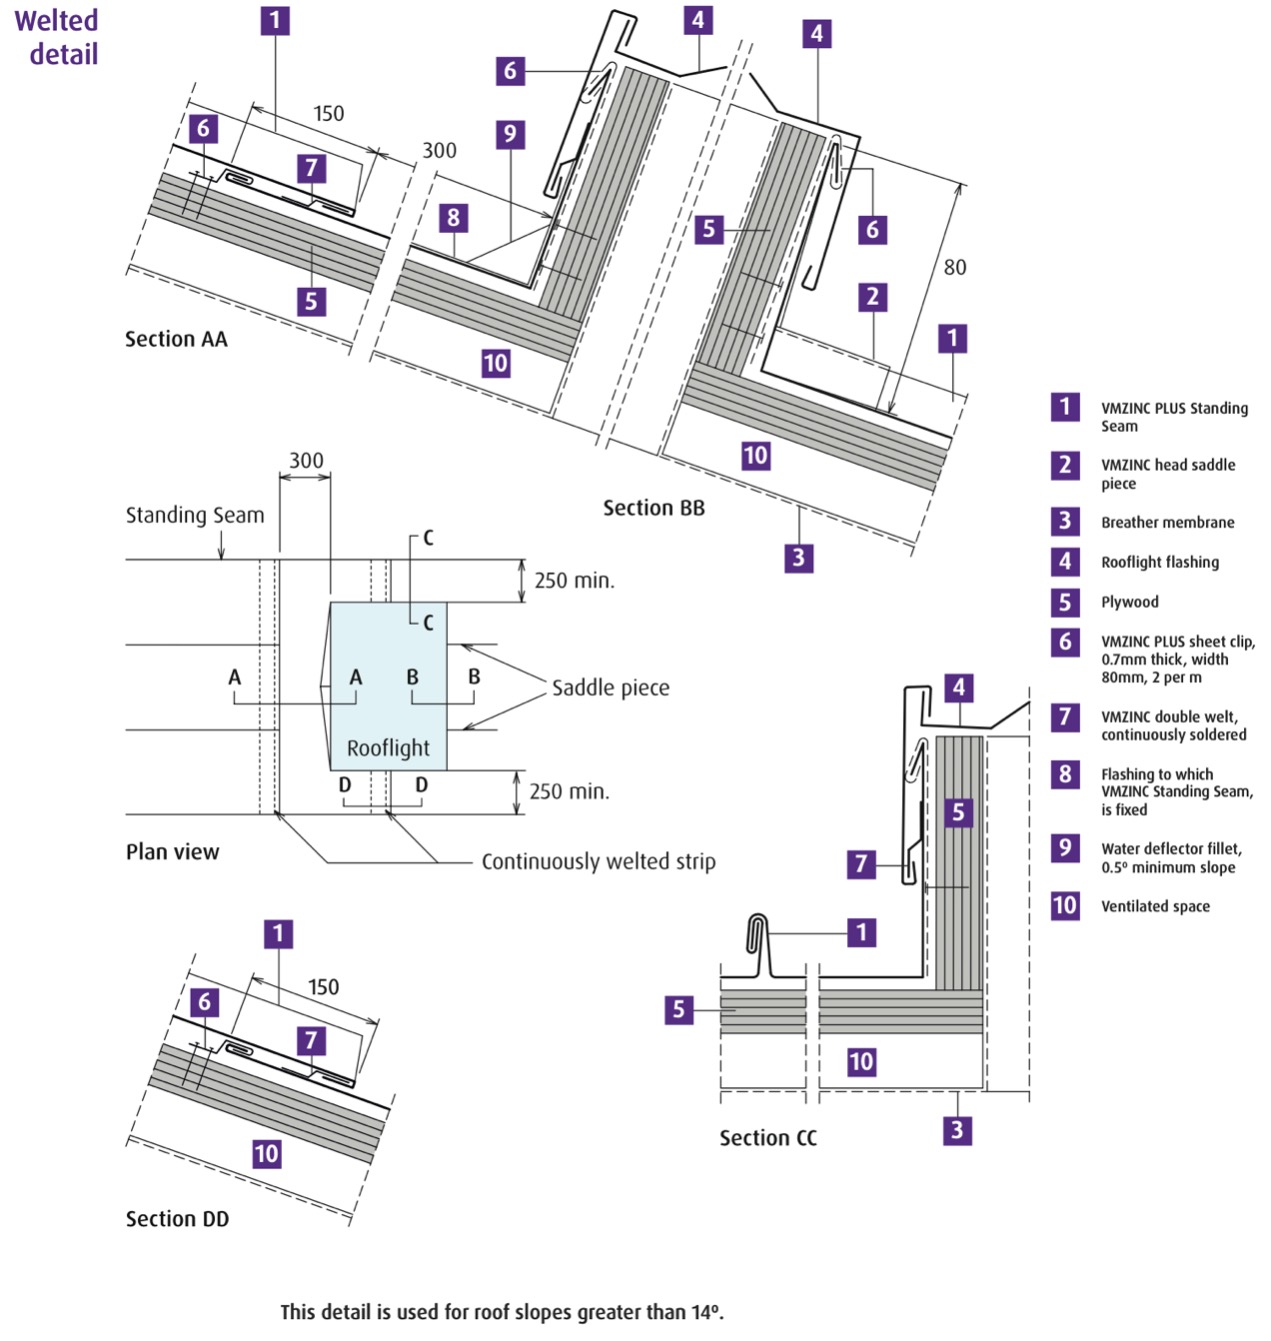
Extract from VMZinc Standing Steam Installation Guide 2018
Rooflight Position
Your rooflights should be positioned with at least 250mm between the sides of the rooflight and the next standing seam. This allows water to flow easily and quickly down the sides after it has been deflected by the rooflight.
Rooflight Head
 At the head of the rooflight the standing seam roofing ends 300mm short of rooflight with a continuously soldered double welt, fixed with a soldered cleat to a flat zinc back panel. Behind the overlap between roofing and back panel, which should be 150mm deep, is a hem where the zinc is folded over, creating a gap between the two sheets of metal.
This welted detail allows for thermal movement whilst reducing the risk of capillary action at the same time.
Make sure the cleat is soldered and not screwed, and ensure that no mastic is used in this detail – not only does mastic encourage capillary action, it has a much shorter life than the zinc and will fail.
Behind the head of the rooflight there is a water deflector or conductor, designed to deflect rainwater around the sides of the rooflight. This three-dimensional piece of zinc is soldered together with a slight fall.
Upstands
The rooflight upstand height needs to be a minimum of 80mm between the finished roof surface and the top of the rooflight. It is not uncommon for architects to ask for a smaller upstand, but this is not recommended with a welted rooflight because there is a risk of water running over the face during heavy rain and for water ingress to occur.
You’ll also notice in the installation guide the installers leave a 10mm expansion gap between the base of the zinc where it meets the timber upstand – the fold isn’t 90 degrees. Rather than forcing the zinc panel into the upstand, this slight angle allows for some thermal movement. Remember that installing zinc is a skilled craft and these best practice techniques are born from years of experience. Zinc roofing should always be installed by a trained specialist.
Behind the rooflight flashing at the top of the zinc there is another hem. This is a water check which makes the zinc a little stiffer around the rooflight, but more importantly protects against any wind driven rain entering the fabric.
Next lets look at the differences between this approach and the soldered detail used for roofs below 14º pitch.
Zinc Standing Seam Rooflight Soldered Detail – 3-14º pitch
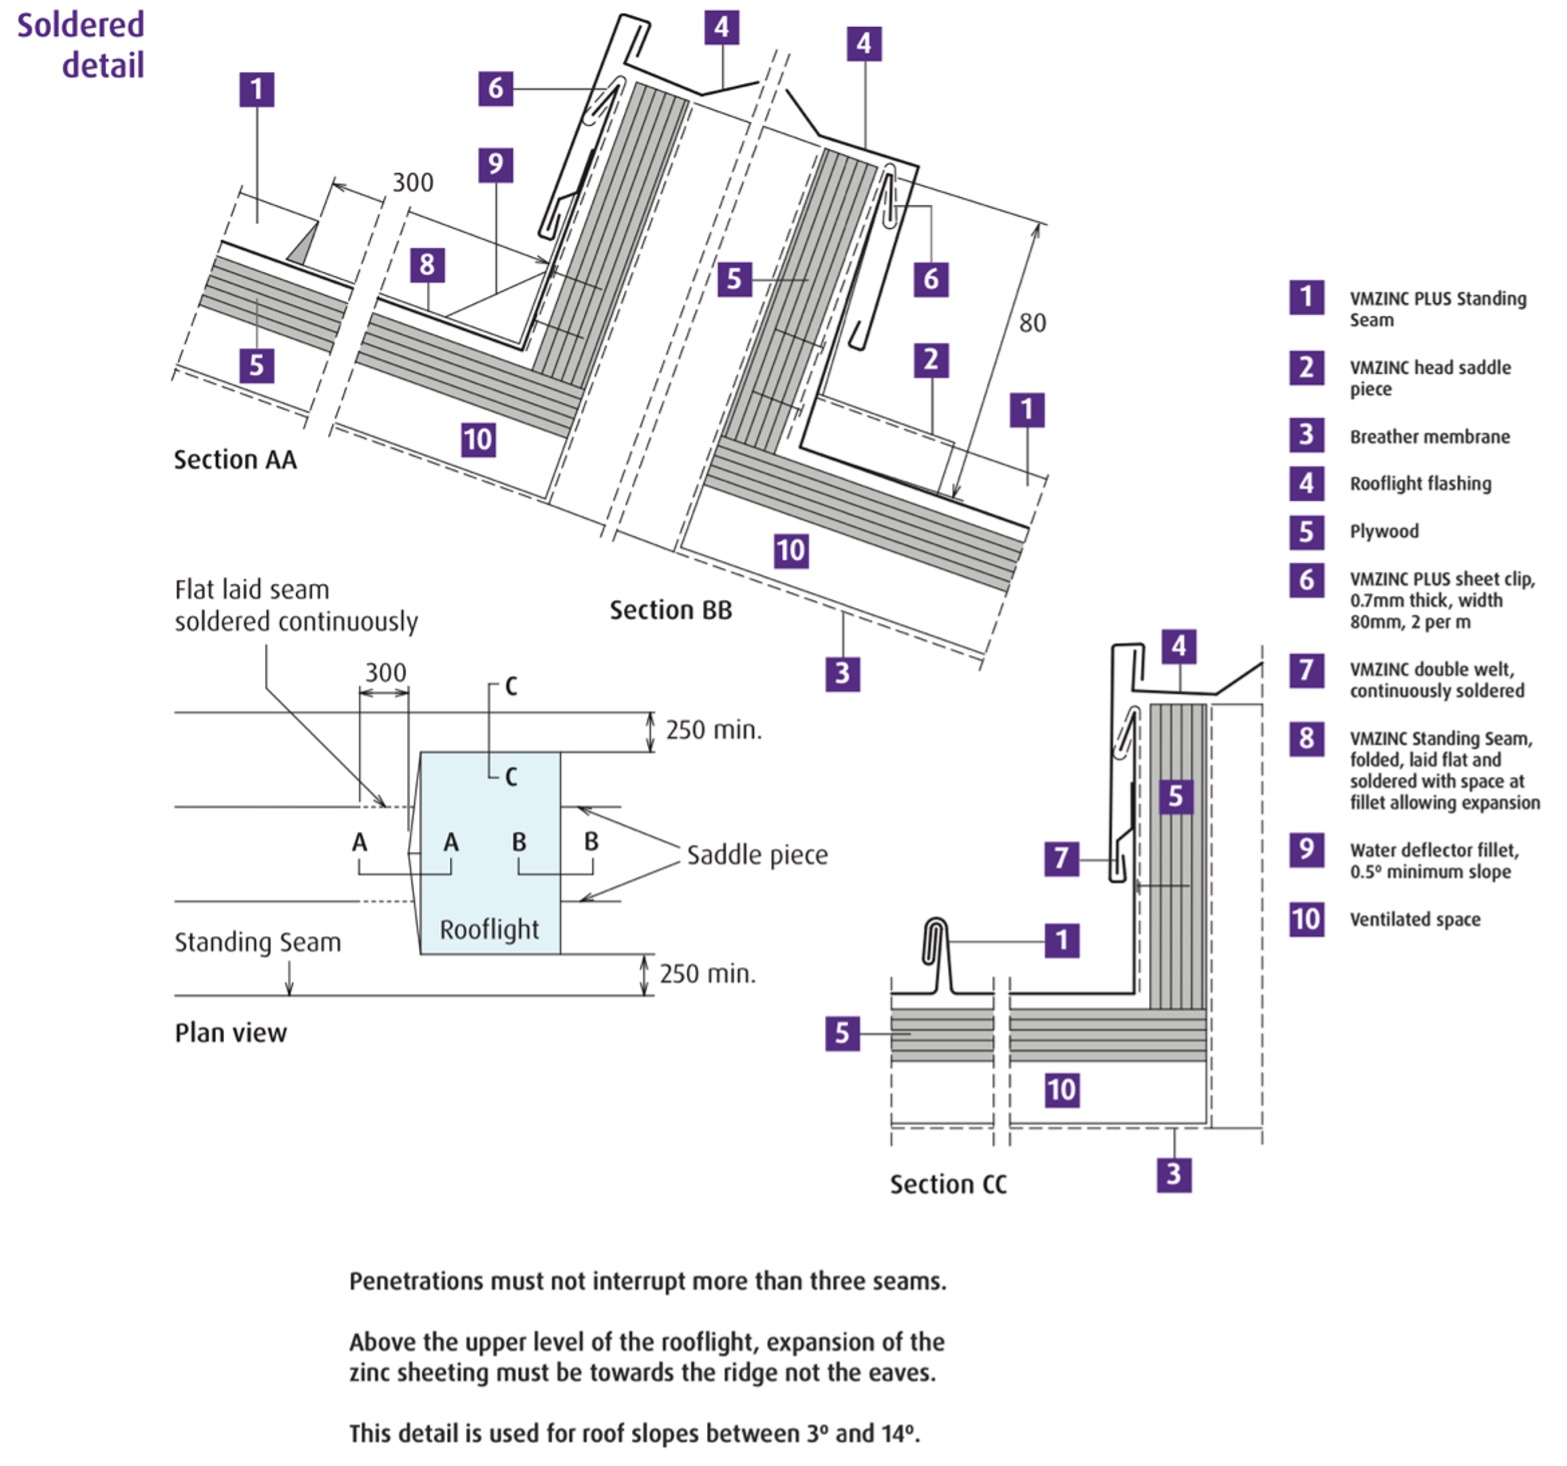
Extract from VMZinc Standing Steam Installation Guide 2018
Soldered Head Detail
In the soldered detail many of the features are the same, but some key differences should be highlighted. For roofs below 14º, instead of the welted joint at the head, the last 300mm of the zinc panels are soldered together.

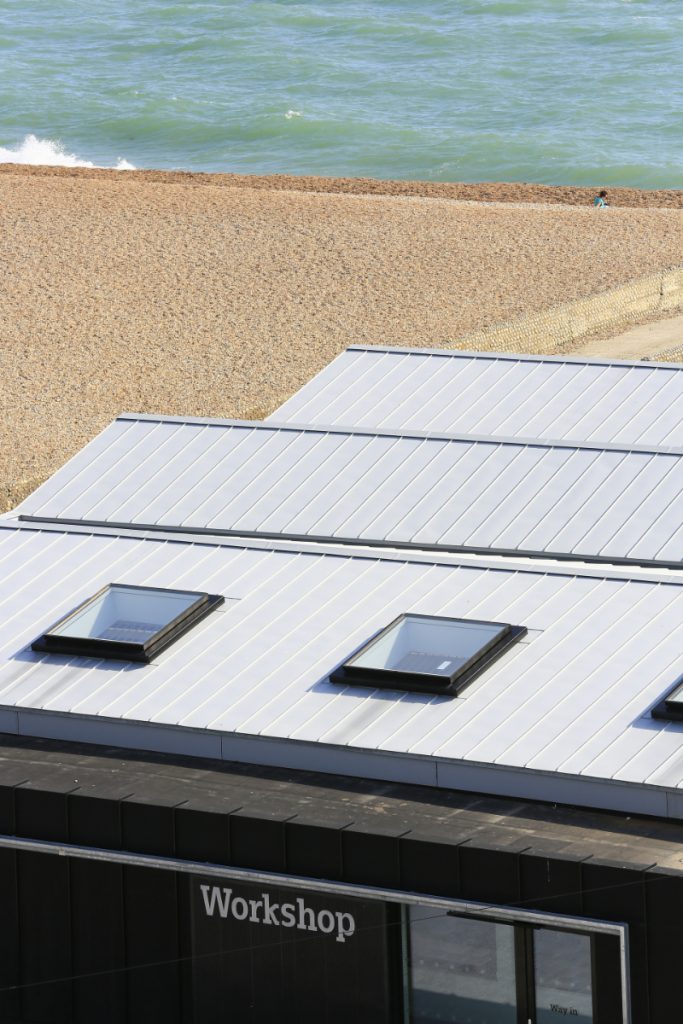
Rooflight in low pitch roof with soldered seams
The low pitch soldered detail effectively creates a gutter all around the rooflight to ensure that water is shed off the roof even at the lower pitch and there is no opportunity for capillary action. However, there is a downside; whilst it makes the rooflight weathertight, solder doesn’t allow for movement. This becomes an issue as the rooflight gets wider.
Wider Rooflights and Low Pitch Zinc Roofs
Low pitch and wide rooflights don’t go together. To create a durable weathertight joint at low pitch, the zinc panels need to be soldered together near the rooflight, but you cannot solder more than three seams, because solder creates a single sheet which cannot move under thermal changes. Above a certain width, the soldered joints will crack under the thermal movement, which is why we recommend a maximum three seams are soldered in this way.
Flush Rooflights
The extreme of this situation is the flush or sunken rooflight, where to reduce the upstand, a gutter or ‘moat’ is inserted into the depth of the roof to allow the surface of the rooflight to be flush with the roof surface.
A watertight gutter is essential in this situation, but there are other consequences such as interference with structure, insulation and more which need to be considered. We talk about this in our post about rooflights in metal roofing.

Rooflight with a moat gutter
Bespoke Zinc Standing Seam Rooflight Details? Talk to the Experts
There are times when standard details won’t meet your project requirements, or you may simply need advice and support. If you know what to consider, you’ll make the right decisions early and it saves having to unpick things later with messy compromises.
If you’ve got a zinc roofing project which you’d like to incorporate rooflights into, get in touch. We’re just an email or phone call away.
About the author – SIG Zinc and Copper Team
We are the team at SIG Zinc & Copper. We design and supply zinc, copper, aluminium and stainless steel roofing and cladding products all over the UK. We also publish blog posts! We're part of SIG Roofing. With over 120 branches nationwide, SIG Roofing is the largest supplier of roofing materials in the UK, providing our customers with impartial advice on the right roofing solution for their projects.


Recent Comments